Free & Easy Returns
Best Deals


DIY Supplies : Metalworking
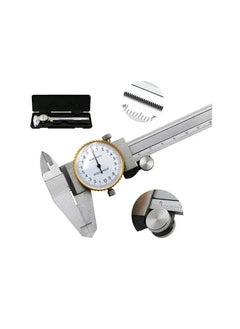
Measurement Range : 0-150mm
Material : STAINLESS STEEL
Accuracy : 0.02mm
Caliper Type : Dial Calipers
Packing include:1-Piece
Instructions for use
1: Before use, loosen the fastening screws on the ruler frame, pull the ruler frame away smoothly, and wipe the measuring surface and guide surface with a cloth.
2: * Correct the "zero" position. As shown in the right figure, move the ruler frame to make the two outer measuring surfaces contact. At this time, the needle should coincide with the "zero" line above the pointer. If it does not coincide, loosen the fastening screw of the watch ring, turn the watch ring to align it, and then tighten the fastening butterfly screw of the watch ring.
3: * Example of reading method:See the schematic diagram of reading on the right. When the scale graduation value is 1mm, the indicator graduation value is 0.02 mm, and the indication value range is 2mm, the main scale reading is 27mm, the indicator reading is 0.96mm, and the reading result is: 27.96mm
4: Direct measurement and comparative measurement:
Direct measurement: directly measure the workpiece with a caliper, and read the measured value of the workpiece according to the above reading method.
Comparative measurement: place the standard gauge block (or standard sample) between two measuring surfaces (hole, ring gauge), first loosen the fastening screw of the dial, turn the dial, make the needle coincide with the "zero" line, lock the table, and then measure the workpiece, and then read the size difference between the workpiece and the standard sample from the indicator. This batch inspection of the same size of people will greatly improve work efficiency.
Note:
1.Please allow 1-3mm difference due to manual measurement.
2.Due to light and screen difference, the item color may be slightly different from the pictures.
| Model Number | ETG0028 |
| Model Name | ETG0028 |

